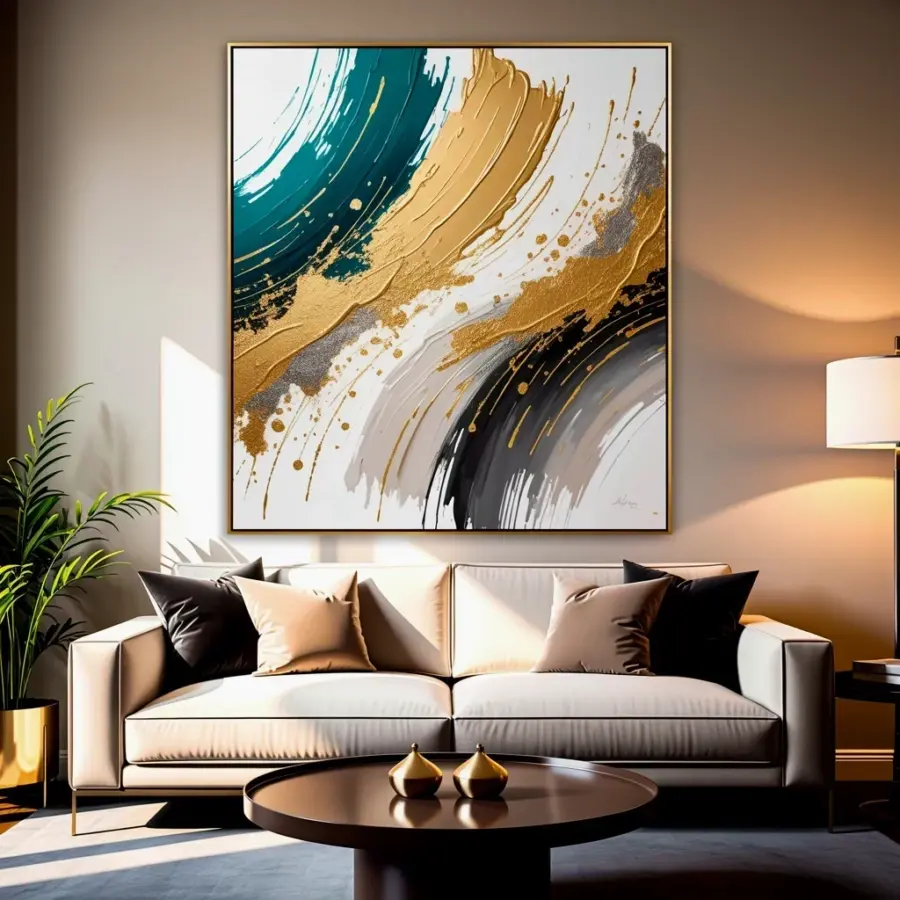
Last weekend I finally finished my cloud texture wall, and honestly? I have not stopped staring at it. That soft, rounded texture with the teal and grey and a little powder pink feels like someone bottled a rainy afternoon and spread it across my living room. The gold accents were a last minute decision, thank goodness. They catch the light in the evening and make the whole thing feel warm and dreamy, not cold or gloomy at all. I curl up there with tea every single night now. If you have been scrolling Pinterest wondering how people get that look, I promise it is simpler than it seems.
What Exactly Is a Cloud Texture Wall
Ok so it is not actually made of clouds, that would be weird and also very wet. It is a thick, dimensional wall finish that uses joint compound or plaster to create soft rounded peaks and valleys across the surface. You build it up in layers, let it dry, then sand or sculpt it until it looks like a cumulus cloud stretched across your wall. The result is soft, lumpy in the best way, and incredibly cozy to touch. Not gonna lie, I find myself running my hand along it when I walk past.
Unlike a flat paint job, this finish hides imperfections beautifully. Got a wall that is a little wonky? Perfect. The texture will disguise every weird bump and uneven corner. Plus it absorbs and reflects light differently depending on the time of day, which means your room never looks quite the same twice. That is the real magic of it, I think.
Why Gold Accents Work So Well with a Cloud Texture Wall
Here is the thing about gold accent wall treatments: they add a little structure to something inherently soft and messy. Cloud texture is organic and a bit chaotic by nature. The peaks go wherever the spatula takes them. But when you brush on a thin wash of gold metallic paint or press gold leaf into some of the deeper crevices, you give the eye somewhere to land. It creates a beautiful tension between rugged and refined.
I used a very old makeup brush dusted with gold mica powder and just pounced it onto the highest peaks of the texture. It took maybe twenty minutes. The gold catches the light in different spots depending on how the sun moves, so the wall feels alive all day long. One neighbor asked if I had installed a light fixture inside the wall. No. Just some gold powder and the 4pm sun. Very fancy, very cheap.
Tools and Materials for a Handmade Wall Finish
Listen, you do not need expensive equipment for this. I made a huge mess with about forty dollars worth of supplies. Here is what you will actually use:
- One bucket of lightweight joint compound (do not get the heavy stuff, your arms will hate you)
- A wide drywall taping knife, around 12 inches works fine
- A smaller spatula or palette knife for the fiddly bits
- Latex paint in your base colors (I used Behr in a custom teal mix)
- Gold mica powder or gold metallic paint for the accent layer
- A cheap foam brush or an old makeup brush for applying the gold
- Drop cloths everywhere. Everywhere. Cover the floors and furniture twice.
The joint compound is basically your canvas. You can tint it with paint before application, or paint over it after it dries. I did a bit of both because I am impatient and wanted to see color immediately. No regrets.
Step by Step: Creating Your Own Statement Wall Art
First, prep your wall. Clean it, tape off the trim, and lay down those drop cloths I mentioned. Then mix your joint compound until it is smooth and a little looser than peanut butter. You want it spreadable but not drippy.
Load a generous slab onto your taping knife and smear it onto the wall in a random pattern. Do not try to make it even. The whole point is unevenness. Poke at it, swirl it, stab it a little with the knife tip. Let some areas stay thick and others thin. Walk away for ten minutes, come back, add more compound in spots that look too flat. Ok, here is a weird personal detail: I got a little too into the texture and accidentally made a shape that looks vaguely like my cat. I left it. It is her wall now.
Let that dry for at least 24 hours. Longer if you live in a humid climate. Then mix your paint with a tiny bit of water to make a wash, and brush it over the entire surface. The paint settles into the valleys and wipes off the peaks, which gives you that natural depth. Once that dries, dry brush your gold accents onto the highest points only. You are not covering the wall, just kissing it with shine.
Color Combinations for Dreamy Wall Decor
My wall uses teal, grey, white, and powder pink. It sounds like a lot but it reads as a single soft atmosphere, not a rainbow. If you want dreamy wall decor that feels like a hug, stick to colors within the same family. Warm greys, muted blues, dusty roses, cream. Save the bright colors for a different project, maybe a kids room or a funky hallway.
I have seen this done with sage green and champagne gold and it was stunning. Also all white with a hint of silver mica looks like a snow bank in morning light. Honestly you could do a deep charcoal with copper accents and it would feel moody and luxurious instead of soft and airy. The beauty of a handmade finish is that the texture does the heavy lifting, so your color choices matter less than you think. Pick something that makes you happy and go with it.
Where to Use This Finish in Your Home
A full room of this would be overwhelming. Trust me, I considered it and then came to my senses. One wall is plenty. A statement wall art approach works best behind a bed, a sofa, or a reading nook. A small powder room could handle it on all four walls if the room is tiny, that actually feels like a cozy cocoon.
My wall is behind my armchair and a small side table with a lamp. The gold picks up the lamp light at night and the whole corner glows. It is genuinely the coziest spot in my house now. I would avoid putting it in a high traffic hallway where people bump into it constantly. The texture is durable but not invincible. And please, please keep it away from any spot where a toddler might lick it. Joint compound tastes terrible and also I am told it is not food safe.
Caring for Your Textured Wall
Dust settles into the crevices over time. A microfiber duster on a long handle works well, just wave it gently over the surface every couple weeks. Do not vacuum it. I tried that once and the suction pulled up a chunk of texture and I had to patch it. Never again. For deeper cleaning, a slightly damp cloth dabbed lightly on the spots works fine.
If a chip or crack appears, do not panic. Mix a tiny bit of leftover joint compound, dab it on with your finger, and retexture it roughly to match. Let it dry, touch up the paint, and nobody will ever know. This is not a fragile princess of a wall finish, it is a forgiving, earthy thing that ages well.
So here is what I want you to take away. You can do this. A cloud texture wall with gold accents is not some mysterious artisan craft reserved for people with fancy tools and decades of experience. It is mud on a wall, smooshed around by hand, kissed with paint and a little sparkle. It is forgiving, imperfect, and genuinely beautiful. If you want a cozy spot that feels like your own private sky, go grab a bucket of compound and get messy. Your living room will thank you.
#cloud texture wall #gold accent wall #handmade wall finish #statement wall art #dreamy wall decor
Leave a Comment