The Overcrowding Trap: Why Less is More in Coastal Shadow Boxes
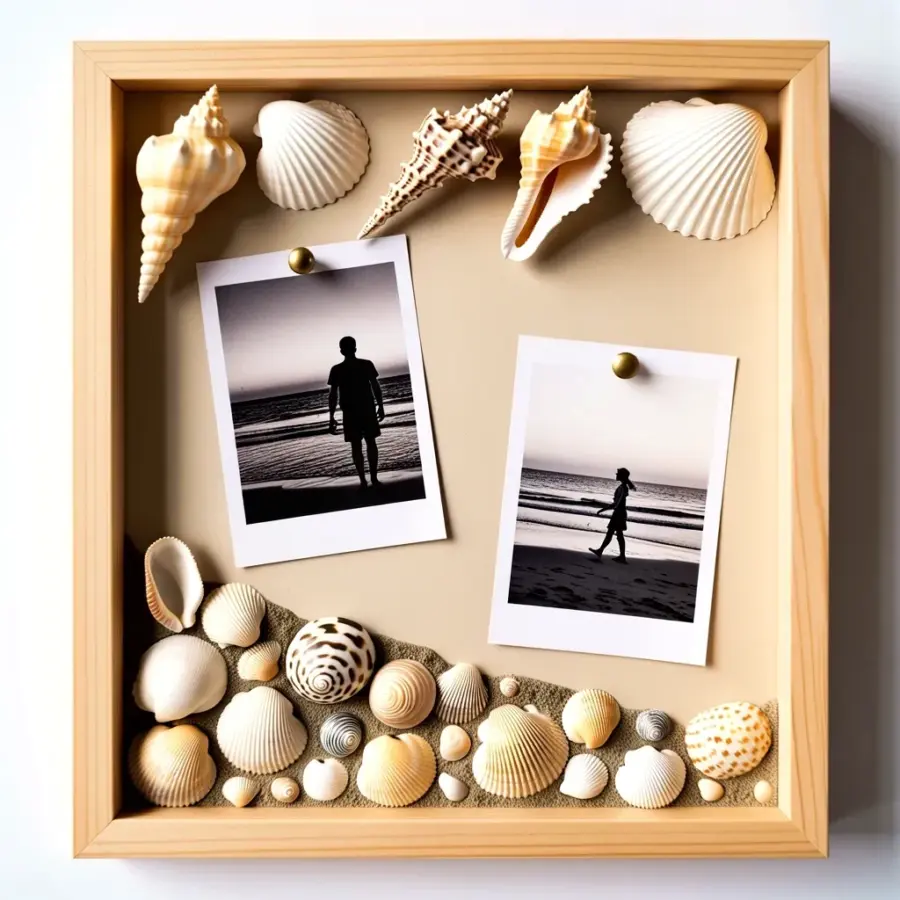
The one mistake I see most often in seashell shadow box displays is overcrowding. People want to include every single shell they collected on vacation, and the result looks like a messy jumble rather than a curated piece of art. My own shadow box (the one in the photo) deliberately avoids that problem. I used a light wood frame to keep the whole piece airy, then arranged larger shells at the top and smaller ones at the bottom. The space between each shell lets the eye rest, and the two black and white photos give the composition a natural focal point. When you pair your beach treasures with personal photos, you get meaningful wall art instead of a cluttered souvenir box.
Balancing Shell Sizes: Large at Top, Small at Bottom
Gravity isn’t just a physics concept; it also guides how we read a display. Our eyes naturally travel from top to bottom, so placing your biggest, most dramatic shells up high creates a strong anchor. In my shadow box, a large spiral shell and a textured conical shell sit at the top. Their white and cream colors catch the light without competing. Below them, I poured a bed of smaller white and cream colored shells, including spiral patterns and tiny round ones. This downward taper feels calm and intentional. It also prevents the heavy shells from crushing the delicate ones visually.
- Top layer: use one or two statement shells, like a conch or a large whelk.
- Middle layer: transition with medium sized scallop or clamshell halves.
- Bottom layer: scatter small cowries, augers, or broken shell pieces for texture.
This gradient of sizes gives the shadow box depth and a sense of order. It mimics how shells naturally settle on the beach, scattered but not chaotic.
Incorporating Personal Photos for Meaningful Wall Art
Shells alone can feel impersonal. Adding photographs turns a generic display into a memory capsule. In my example, I used two black and white photos mounted on the cream background. The lack of color makes them recede behind the shells, so both the images and the seashells remain visible without fighting for attention. You can use your own photos of the beach where you found the shells, a silhouette of a family member, or a close up of waves. Black and white works especially well because it matches the neutral tones of most seashells. If you prefer color, choose images with muted blues and sands so they don’t clash with the coastal palette.
A practical tip: print your photos on matte paper so they don’t reflect the glass of the shadow box. Position them slightly off center to create asymmetrical balance with the shells. This trick keeps the display feeling modern rather than stiff.
Choosing the Right Frame: Light Wood for an Airy Feel
The frame is like the breathing room for your arrangement. A heavy, dark frame can make even a sparse display feel crowded and heavy. The light wood frame in my shadow box is barely noticeable; it simply frames the contents without shouting. Light woods such as birch, pine, or ash work beautifully with white and cream shells. They also echo the driftwood tones found on many coastlines. If you prefer painted frames, choose a soft white, pale gray, or even a washed blue to keep the airy coastal style. Avoid black or very dark brown unless you are going for a dramatic, moody look that contrasts sharply with light shells.
Also consider the depth of the frame. A shadow box should be at least an inch deep to allow for three dimensional layering. Too shallow and you will have to press everything flat, losing the natural curves of the shells. Too deep and the objects can look swallowed. Measure your largest shell before buying the frame to ensure it fits comfortably.
Layering Textures and Colors: Spiral Shells, Conical Shells, and White Accents
Not all white and cream shells look the same. The contrast between a smooth spiral shell and a ridged conical shell adds visual interest without extra color. In my shadow box, the textured conical shell at the top has distinct ridges that catch shadows, while the large spiral shell is smoother and reflects light evenly. At the bottom, the tiny round shells and spiral patterns create a sandy, pebbly texture. This variety keeps the eye moving across the display. If you have shells with subtle pink, lavender, or tan tones, those can work as accent colors. Just be careful not to introduce too many hues, or the coastal calm disappears.
One easy way to test texture balance is to arrange the shells on a flat surface before gluing anything. Step back and squint; do all the textures blend into one blur? If yes, add a few shells with distinct shapes, like a spiky murex or a smooth olive shell. The goal is a harmonious mix, not a uniform pile.
Themed Shadow Boxes: Beach Memories in a Frame
Instead of throwing all your vacation finds together, consider building a shadow box around a specific memory. For example, a “morning walk” theme could include a few shells found on a single morning, a small photo of the sunrise, and a tiny bottle of sand. A “family trip” theme might feature shells collected by each person, along with a photo of the group at the shore. The two black and white photos in my shadow box suggest a quiet, timeless moment; they could be from any beach trip. By limiting the theme, you naturally avoid overcrowding because you only include pieces that belong to that story.
Another idea is a “texture study” theme, where you focus on shells with very different surfaces: smooth, ridged, bumpy, and spiraled. Pair them with a single photo of the shoreline for context. That approach keeps the shadow box tight and editorial, perfect for a gallery wall in a coastal style home.
DIY Tips for Your Own Seashell Display
Building a shadow box does not require expensive tools or special skills. Start with a frame you already own or buy one from a craft store. Remove the glass if the frame has it, because glass can flatten the three dimensional effect and cause glare. Use a piece of foam board or heavy cardstock as the background. Position your shells and photos without adhesive first; move them around until the arrangement feels balanced. I like to place the largest shell or the photo first, then work outward. Once you are satisfied, use a hot glue gun or a strong craft glue to attach everything. For small shells, a dab of glue on the back works well. For larger shells, use a bit more glue and press gently for a few seconds.
Let the glue dry completely before hanging the shadow box. Hang it away from direct sunlight to prevent shells from fading or the photos from yellowing. A spot near a window with indirect light is perfect. And remember, you can always swap shells later if you find a prettier one on your next beach trip. That is the beauty of DIY wall art; it evolves with your memories.
I hope these ideas help you avoid the common mistake of overcrowding. A thoughtful seashell shadow box display turns simple beach finds into a personal gallery. Start small, edit ruthlessly, and let your best shells and photos shine together. Have you built a shadow box yet? I would love to hear what theme you chose for yours.
#shadowbox #seashellwalldecor #coastalstyle #beachmemories #diywallart
Leave a Comment