Why I Kept Hanging Everything at the Wrong Height (and You Probably Do Too)
I’ll be honest: for years I had no idea I was hanging my wall decor wrong. Like, embarrassingly wrong. I walked into my living room one afternoon, looked at a framed print I’d just put up, and something felt off. The piece was floating somewhere near the ceiling. It made the whole room feel top-heavy and disconnected from the furniture below. So here’s the thing: the right height for hanging art isn’t “wherever the nail lands.” It’s a specific number. And I only learned that after staring at a wall for twenty minutes, tape measure in one hand, coffee in the other, feeling like an idiot.
The fix is stupidly simple. You center your art at eye level, which is roughly 57 to 60 inches from the floor. That’s it. But you wouldn’t believe how many people (including me) default to hanging pieces way higher, because we think “art should be seen” or “I need to fill that big empty space.” Nope. Lower is better. Honestly, try it. Your room will thank you.
Anyway, this whole discovery came from a tiny watercolor I bought at a flea market. It was maybe eight inches square. I put it up at 65 inches. My friend walked in, looked at it, then at me, and said, “Is that for giants?” She wasn’t wrong. So I pulled it down, moved the hook down eight inches, and suddenly the painting looked like it belonged. Like it was part of the room, not a floating sticker.
The 57 Inch Rule That Changed My Accent Wall
Okay so the magic number is 57 inches from the floor to the center of the artwork. Why 57? It’s the average human eye level (in most museums, that’s exactly how they hang stuff). Not everyone is exactly 5’8″, but 57 works for most adults. If you’re decorating a nursery or a hallway where people sit a lot, you might adjust it down a few inches. But for a standard accent wall in a living room or bedroom? 57 is your new best friend.
I tested this on my own accent wall last spring. I had three big floral prints I wanted to cluster. My first instinct was to align them with the top of the window frame, which put the centers at 65 inches. Looked awful. Dropped them to 57. Suddenly the whole wall felt grounded. The sofa, the rug, the lamps, everything connected. It’s not about math. It’s about visual weight. And 57 inches is where the eyes rest naturally.
One weird thing I noticed: when I lowered the prints, the room felt taller. Counterintuitive, right? But that’s because the eye stops traveling upward and instead dances across the wall at a comfortable level. You get a better sense of the whole space.
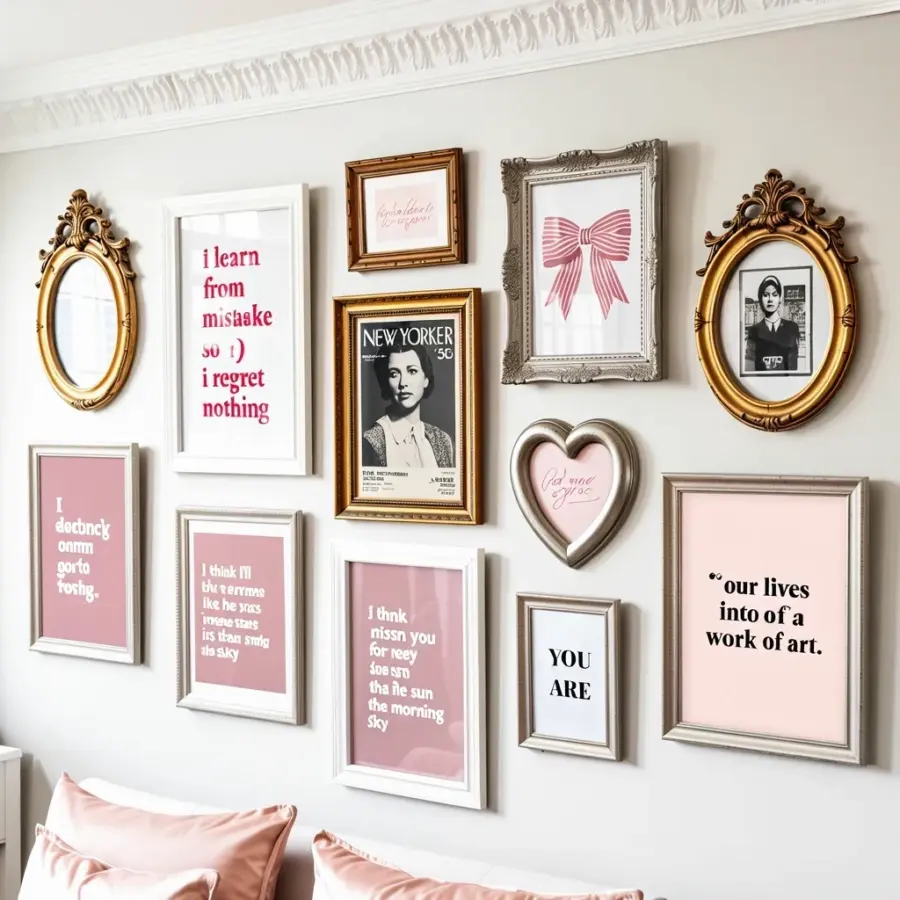
Gallery Walls: How I Fixed My Living Room Cluster
Let me tell you about my gallery wall. It was a disaster. I had eight frames of different sizes arranged in what I thought was a “creative composition.” In reality it was a chaotic mess, partly because half the frames were at 68 inches and the other half at 63. Nothing lined up, and the whole thing looked like it had been attacked by a level-obsessed ghost.
Here’s what finally worked: I picked one anchor piece (the largest) and hung its center at 57 inches. Then I arranged everything else around that, keeping the centers within a two-inch range. Did I measure every single frame? Yes. Did I enrage my partner by taping paper templates to the wall for two days? Also yes. But the result? A hanging art cluster that actually feels cohesive. People walk in and say “wow, your wall looks so put together.” They don’t say “did you use a laser level?” (I did, but that’s between us.)
If you’re building a gallery wall, here are the rough steps I follow now:
- Lay all frames on the floor first. Arrange them until you like the composition. Snap a photo.
- Measure the center of your overall arrangement. Mark that on the wall at 57 inches. This is your anchor point.
- Hang the biggest or heaviest piece first, centered on that mark. Then place the rest, keeping about 2 to 3 inches between frames.
- Use a level. No, really. Use a level. Eyeballing is for dice games, not wall decor.
- The last step: step back, sit on the couch, and look at it from sitting height. If something feels off, move it.
Above Furniture and Staircases: When to Break the Eye Level Rule
Now, rules are made to be bent. Above a sofa, a console table, or a bed, you don’t center art at 57 inches, because the furniture changes the visual baseline. In those cases, the bottom of the frame should sit about 6 to 8 inches above the furniture. So if your sofa is 34 inches tall, the bottom of the art lands around 40 to 42 inches. That usually puts the center somewhere between 55 and 60 inches anyway. See? The rule still guides you, just with a cushion.
Staircases are their own nightmare. I redid my stairwell last winter, and I cannot express how many times I put a nail in the wrong spot. Honestly, at one point I had seventeen nail holes in one wall. Not proud. For stairs, the general trick is to hang each piece so its center aligns with an imaginary line that follows the staircase angle. Or, if that sounds like too much math (it is), just space the frames equally along the wall, about 57 inches from the floor to the center of each piece, measured from the step where the viewer stands. Yeah, it’s fussy.
A hyper-specific detail: I once used a piece of dental floss tied to a small weight to check the vertical alignment on my staircase. It looked ridiculous. My neighbor saw me through the window. I pretended I was testing the structural integrity of the wall. He didn’t buy it.
Measuring Tips That Actually Save Time (and Your Drywall)
If you’re like me, you measure twice, nail once, then realize you measured from the wrong spot. To avoid that, here’s the method I use every single time now, and it has cut my do-overs by like 90%. First, decide where the center of your artwork should be. If it’s a single piece in an open wall, mark 57 inches up from the floor. Then, figure out the height of your art. Divide that by 2. That’s the distance from the center to the top of the frame. Now measure from your 57 inch mark upward by that half-height. That’s where your nail goes. Example: a 30-inch tall frame. Half is 15. 57 plus 15 is 72. Nail at 72 inches. Easy.
But wait: measure from the floor to your mark, not from the ceiling. Ceilings are often not perfectly level, and measuring down from a crooked top line will give you a crooked picture. Nobody wants that. Also, if you’re hanging multiple pieces that aren’t identical, use a laser level or a long horizontal line of painter’s tape to keep the tops aligned. I use painter’s tape because pulling it off leaves zero damage, and I can draw on it with a pencil. My living room wall once looked like a crime scene of blue tape and tiny x’s.
Oh, and here’s something nobody tells you: the wire on the back of a frame is not at the exact center of the frame. The hook you use moves the actual hanging point. So always hang the frame on its wire first, then measure the center of the picture against the wall. Don’t trust the frame’s hardware. Trust your tape measure. I learned this after a particularly wobbly print kept tilting left. Drove me nuts for three weeks.
How to Let Go of the “Fill the Empty Wall” Urge
I think the biggest mistake people make with homestyle isn’t the height, it’s the anxiety about blank space. You get a big empty wall, and you panic. So you shove a giant canvas up there, way too high, just to cover it. But here’s a secret: empty wall space is not your enemy. It’s your friend. It gives the eye a rest. Art that’s hung at the right height creates a quiet, intentional zone. The wall doesn’t need to be filled to the brim.
One of my favorite decoratingtips I ever got was from an old interior designer friend. She said, “Pretend the wall is a gallery. You don’t see art crammed to the ceiling in a gallery. You see it at eye level, with breathing room above and below. Replicate that.” So now I leave at least a foot of empty wall above the art. Feels luxurious. And the art feels important, not desperate.
What about small pieces? Group them, sure, but still keep the cluster center around 57 inches. And don’t be afraid to have a single small print on a large wall. It’s bold. It says, “I know what I’m doing.” I have a tiny 5×7 inch sketch of a cat in a 3-foot wide frame sitting in my hallway. It’s maybe 40 inches off the ground because it’s near a low shelf. People stop and stare at it. It works.
Common Hanging Art Mistakes I Still Catch Myself Making
Even after writing a whole article about this, I still slip up. The other day I hung a new piece at 63 inches without thinking. Had to redo it. So here are a few recurring errors I see (and make):
- Hanging art before the furniture arrives. Without a sofa or bed as a reference, you often guess too high. Wait until the room is mostly set up.
- Using too many nails for a single piece. One properly placed nail with the right hook is enough. More holes = more mistakes.
- Forgetting to account for how the frame actually sits on the hook. Some frames tilt forward. You might need two hooks or a leveling system.
- Ignoring the visual weight of a dark frame. A black frame against a white wall reads heavier than a thin metallic one. Adjust height by an inch or two so it doesn’t feel dominating.
- The “I’ll just eyeball it because I’ve done this before” trap. Every wall is different. Grab the tape measure. Do it properly.
Honestly, the last one is my downfall. I get cocky, skip the measuring, and then I’m patching holes with spackle two hours later. Keep the tape measure nearby. It becomes part of your decor after a while.
So Where Do You Go From Here?
Look, I’m not saying every piece of wall decor needs to be precisely 57 inches. Some rooms call for a higher installation, like a dramatic oversized mirror above a fireplace, or a narrow hallway where you want to draw the eye upward. But as a general rule, centering your art at 57 to 60 inches from the floor will make your home feel more connected, more deliberate, and honestly more professional. It’s the kind of change that costs nothing but time and attention, yet transforms the entire vibe of a room.
Next time you hang a print or start a gallery wall, pause before you pound that nail. Measure. Trust the number. Step back. If it looks right at eye level, you’ve done it. And if you mess up? That’s okay. I’ve got seventeen holes in my stairwell as proof that perfection is overrated. But getting it closer to the right height? That’s worth the extra minute.
Try it on one wall this weekend. See how it feels. Your accent wall will never look the same again.
#walldecor #accentwall #hangingart #homestyle #decoratingtips
Leave a Comment